Cedar shake siding installation made easy and effective
Cedar shake siding installation serves as an excellent choice for homeowners seeking a blend of durability, aesthetic appeal, and versatility. This timeless siding option not only enhances the overall appearance of a home but also complements various architectural styles while providing long-lasting benefits. With a deeper understanding of cedar shake siding, one can appreciate its characteristics, the installation process, and the necessary maintenance to ensure it remains an asset to your property.
As we delve into the specifics of cedar shake siding, we will explore essential preparation steps, installation techniques, and maintenance practices that contribute to the siding’s longevity and performance. With the right knowledge, you can confidently embark on this home improvement journey, transforming your living space with the natural beauty of cedar wood.
![Top siding contractors in [your city]](https://us.masdinko.com/wp-content/uploads/2025/08/1366_2000-220x150.jpeg)
Overview of Cedar Shake Siding

Cedar shake siding is a popular choice among homeowners and builders due to its natural beauty and practical benefits. Known for its durability and resistance to the elements, cedar shake siding enhances the aesthetic appeal of residential and commercial properties alike. This section delves into the characteristics, benefits, and versatility of cedar shake siding, underscoring its role in various architectural styles.Cedar shake siding offers a unique combination of insulation, longevity, and visual appeal.
The use of cedar wood, which is naturally resistant to decay and insect damage, ensures that the siding maintains its integrity over time. In addition, cedar shake siding provides excellent thermal performance, helping to regulate indoor temperatures and reduce energy costs. The natural oils found in cedar also allow it to withstand harsh weather conditions, making it suitable for a variety of climates.
Characteristics and Benefits of Cedar Shake Siding
The benefits of cedar shake siding extend beyond its robust physical properties. Importantly, its aesthetic qualities make it a favored option for many different architectural styles. The following points highlight the primary characteristics and advantages of choosing cedar shake siding:
- Natural Insulation: Cedar wood has a natural ability to insulate, enhancing energy efficiency in homes.
- Durability: Cedar shake siding can last for decades when properly maintained, making it a cost-effective choice in the long run.
- Low Maintenance: With proper sealing and treatment, cedar shake siding requires minimal upkeep compared to other materials.
- Aesthetic Appeal: The rustic charm of cedar shakes adds warmth and character to any property, making it versatile for both contemporary and traditional designs.
- Customization: Cedar shakes can be stained or painted to match various design palettes, enhancing their adaptability.
Types of Cedar Wood Used for Shake Siding
Cedar shake siding is primarily made from two types of cedar wood: Western Red Cedar and Eastern White Cedar. Each type possesses unique qualities that contribute to the overall performance and appearance of the siding. Understanding the differences can help in selecting the most suitable option for specific projects.
- Western Red Cedar: Known for its rich color variations and straight grain, this variety is celebrated for its resistance to decay and insect damage. It is often used in high-end applications due to its aesthetic appeal and performance.
- Eastern White Cedar: Lighter in color and denser than Western Red Cedar, this variety is also resistant to rot. It is commonly used in more economical applications while still providing a pleasing visual effect.
“Cedar shake siding not only enhances visual appeal but also offers practical benefits that make it a wise investment for homeowners.”
Incorporating cedar shake siding into a building project can significantly elevate the overall design while ensuring durability and longevity. By understanding the characteristics and types of cedar wood available, individuals can make informed decisions suited to their tastes and structural requirements.
Preparation for Installation
The preparation phase is crucial for a successful cedar shake siding installation. Properly preparing the site ensures that the installation process goes smoothly, resulting in a durable and aesthetically pleasing finish. This segment Artikels the essential tools and materials needed, steps for site preparation, and necessary safety precautions.
Essential Tools and Materials, Cedar shake siding installation
To efficiently install cedar shake siding, it is important to have the right tools and materials readily available. The following list includes essential items needed for the installation process:
- Cedar shakes: Natural wood shakes specifically designed for siding.
- Underlayment: A moisture barrier typically made from felt or synthetic material.
- Nails: Stainless steel or galvanized nails to prevent rusting.
- Hammer or nail gun: For fastening shakes to the wall.
- Chalk line: To create straight reference lines on the wall.
- Measuring tape: For accurate measurements of the installation area.
- Level: To ensure each row of shakes is installed evenly.
- Saw: Either a circular saw or handsaw for cutting shakes to size.
- Ladder: For reaching higher sections of the wall.
- Pry bar: Useful for adjusting or removing existing siding.
Site Preparation Steps
Preparing the installation site is vital for achieving a professional-looking finish. The following steps should be followed to prepare the area effectively:
1. Measurements
Measure the height and width of the wall where the cedar shake siding will be installed. This ensures that the correct amount of material is purchased.
2. Surface Inspection
Inspect the surface of the wall for any damage or irregularities. Any existing siding should be removed if necessary, ensuring a smooth base.
3. Cleaning the Surface
Clear away dirt, debris, and any loose materials to provide a stable foundation for the new siding.
4. Applying Underlayment
Install a weather-resistant barrier, such as felt or a synthetic underlayment, to protect against moisture intrusion.
5. Marking Reference Lines
Use a chalk line to mark horizontal lines on the wall, indicating where each row of cedar shakes will be installed. This step is crucial for maintaining alignment throughout the process.
Safety Precautions
Safety is paramount during the installation of cedar shake siding. Adhering to safety guidelines reduces the risk of accidents and injuries. Key precautions include:
- Wear Protective Gear: Ensure the use of safety goggles, gloves, and a hard hat to protect against falling debris.
- Use Ladders Safely: Ensure that ladders are stable and positioned on firm ground to prevent falls.
- Monitor Weather Conditions: Avoid installation during inclement weather, such as rain or strong winds, which can create hazardous conditions.
- Handle Tools Responsibly: Use tools as intended and ensure that all equipment is in proper working condition before beginning the installation.
- Maintain a Clean Work Area: Keep the worksite free of clutter and debris to minimize tripping hazards.
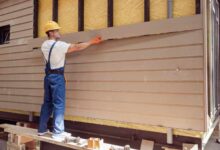
Installation Process
The installation of cedar shake siding is a meticulous and rewarding process that enhances the aesthetic appeal of any home while providing long-lasting durability. This section Artikels the critical steps involved in correctly installing cedar shake siding, emphasizing starter courses, nailing techniques, and the importance of cutting and fitting around windows and doors. Additionally, it addresses the essential aspects of ensuring proper ventilation and moisture barriers during installation.
Starter Courses and Nailing Techniques
The installation of cedar shake siding begins with the preparation of starter courses, which are crucial for achieving a uniform finish. The starter course should be installed along the bottom edge of the wall, creating a level surface for the shakes to be laid upon. To install the starter course:
1. Measure and Cut
Measure the length of the wall and cut the starter boards to fit, allowing for any necessary overlap.
2. Positioning
Align the bottom edge of the starter course with the bottom of the wall, ensuring it is level and properly spaced from the ground to prevent moisture damage.
3. Nailing
Use galvanized nails to secure the starter course, driving the nails at an angle to allow for expansion and contraction. The nails should penetrate at least 1.5 inches into the underlying structure.As you move up the wall, nailing techniques are critical for ensuring the shakes are securely fastened:
Nail Placement
Each shake should be secured with at least two nails, driven into the thickest part of the shake and at least 1 inch from the edges to prevent splitting.
Nailing Pattern
When budgeting for home maintenance, one significant factor to consider is the cost to reside a 2000 sq ft house. This cost encompasses various aspects such as utilities, insurance, and repairs. In particular, if your residence has suffered from severe weather, it’s important to address issues promptly, such as seeking professional help for siding repair for storm damage , to protect your investment.
A staggered nailing pattern should be used to enhance the overall strength and aesthetic appearance of the siding.
Proper nailing techniques are essential for the longevity of cedar shake siding, preventing issues related to wind and weather exposure.
Cutting and Fitting Around Windows and Doors
Accurate cutting and fitting of cedar shakes around windows and doors are vital for maintaining the integrity of the installation and preventing water intrusion. When approaching these openings, the following steps should be taken:
1. Measure the Opening
Start by measuring the dimensions of the window or door frame.
2. Cut the Shakes
Using a circular saw or handsaw, cut the shakes to fit snugly around the framed opening, ensuring to leave a small gap for caulking and expansion.
3. Install Trim Pieces
Add trim pieces around the edges of the window or door to cover any gaps and provide an aesthetically pleasing finish.
4. Seal the Edges
Apply a high-quality exterior caulk around the edges to create a watertight seal.
Precision in cutting and fitting is critical; it not only enhances the visual appeal but also protects against moisture damage.
Ventilation and Moisture Barriers
Ensuring proper ventilation and moisture barriers during the installation of cedar shake siding is imperative for preventing rot and extending the lifespan of the material. Before installing the shakes, follow these guidelines:
1. Install a Moisture Barrier
Begin by applying a moisture barrier, such as felt paper or a synthetic underlayment, over the sheathing. This barrier serves to redirect any moisture away from the siding.
Understanding the cost to reside a 2000 sq ft house is essential for homeowners. This knowledge helps in budgeting effectively and making informed decisions regarding maintenance and improvements. Additionally, if your property has been affected by adverse weather, it may require professional assistance for siding repair for storm damage , ensuring the integrity and aesthetics of your home are restored.
2. Ventilation Spaces
Incorporate ventilation spaces between the siding and the moisture barrier. This allows airflow, reducing the risk of trapped moisture that can lead to decay.
3. Utilize Vents
Include vents at the top and bottom of the siding installation to facilitate airflow and prevent heat buildup behind the shakes.
Proper ventilation and moisture management are key to ensuring the longevity and performance of cedar shake siding.
Maintenance and Care

Cedar shake siding requires regular maintenance to ensure its beauty and longevity. Proper care not only enhances the aesthetic appeal of your home but also protects it from environmental damage, thereby extending the lifespan of the siding. Implementing a routine maintenance schedule will help in preserving the integrity of the cedar shakes and keeping your home looking its best.
Periodic cleaning and inspections are fundamental aspects of maintaining cedar shake siding. Regular upkeep prevents the growth of moss and mildew, which can lead to decay if left unattended. Below are best practices for maintaining cedar shake siding.
Best Practices for Maintenance
To maintain the quality and durability of your cedar shake siding, consider the following practices:
- Regular Cleaning: Clean the siding at least once a year to remove dirt, debris, and any organic growth. Using a soft-bristled brush and a mixture of water and mild detergent is generally effective.
- Inspect for Damage: Regularly examine the siding for signs of wear, such as cracks, warping, or insect damage. Early detection allows for timely repairs, preventing further deterioration.
- Sealing and Staining: Apply a protective sealant every 3 to 5 years to enhance water resistance. A high-quality stain not only preserves the natural beauty of the wood but also adds an extra layer of protection against UV rays.
Cleaning Process and Removal of Moss or Mildew
Cleaning cedar shake siding is essential for maintaining its appearance and preventing damage. The cleaning process involves specific steps:
Regular cleaning prevents the buildup of mold and mildew, which can compromise the wood.
Begin by rinsing the siding with a garden hose to remove loose debris. For tougher stains or growths, prepare a cleaning solution using one part bleach to three parts water. Apply this solution using a spray bottle or garden sprayer, ensuring it covers the affected areas thoroughly. After letting it sit for about 15 minutes, scrub the surface with a soft-bristled brush to lift any stubborn stains or growths.
Rinse the entire area with water to remove all cleaning agents and debris.
Importance of Periodic Inspections and Treatments
Conducting regular inspections allows homeowners to catch potential problems early, minimizing repair costs and extending the life of cedar shake siding. During inspections, look for signs of moisture retention, which can lead to rot. Treatments such as sealing or staining not only enhance the wood’s appearance but also add protective barriers against elements that could induce damage.
Periodic treatments should be scheduled based on the climate and exposure levels received by the siding. In regions with high moisture, more frequent treatments may be necessary. Conversely, in drier climates, treatments can be spaced further apart. By adhering to these maintenance guidelines, homeowners can enjoy the timeless beauty and performance of cedar shake siding for many years.
Common Issues and Solutions

Cedar shake siding installation can enhance the aesthetic value of a home while providing durability and insulation. However, challenges can arise during and after installation. Addressing these common issues proactively can significantly extend the lifespan of the siding and maintain its visual appeal.
Installation Issues and Solutions
Several installation-related issues can impact the performance and durability of cedar shake siding. Common challenges include improper alignment, inadequate spacing, and insufficient sealing. Each of these can lead to problems such as moisture penetration and warping. Below are some frequent issues and their respective solutions:
- Improper Alignment: This can result in an uneven appearance and water pooling. To correct this, ensure that each shake is installed level and aligned with the adjacent shakes. Utilize a level and chalk line to mark installation points clearly.
- Inadequate Spacing: Lack of proper spacing may lead to warping and buckling. Maintain a consistent gap of about 1/4 inch between shakes to allow for expansion and contraction due to temperature changes.
- Insufficient Sealing: Gaps and seams that are not properly sealed can invite moisture. Use a high-quality sealant designed for wood products to ensure that all joints are adequately sealed during installation.
Weather-Related Damage and Solutions
Weather conditions can severely affect the integrity of cedar shake siding. Rain, sun, and snow can all contribute to various forms of damage, including rot, warping, and fading. To mitigate these potential issues, consider the following protective measures:
- Moisture Management: Regularly inspect for and repair any leaks in the roofing or gutters that could direct water onto the siding. Implementing a water barrier during installation can also help protect against moisture intrusion.
- UV Protection: To prevent fading and warping from sun exposure, apply a high-quality wood preservative or stain. This treatment should be reapplied as needed based on environmental exposure.
- Snow and Ice Management: In climates where snow accumulation occurs, ensure that snow is removed promptly to prevent moisture retention against the siding. Installing eavestroughs can help divert melting snow away from the surface.
Pest Issues and Prevention
Cedar shake siding, while beautiful and natural, is also susceptible to infestations by pests such as termites, carpenter ants, and woodpeckers. These pests can cause significant damage if not managed appropriately. Preventative measures should be taken to safeguard against such infestations:
- Regular Inspections: Conduct routine inspections to identify any signs of pest activity, such as small holes in the shakes or powdery residue indicative of termite activity.
- Wood Treatments: Apply treatments specifically designed to deter pests. Products containing borates can effectively protect wood from structural pests without harming the environment.
- Landscaping Considerations: Keep plants and trees trimmed back from the siding to prevent pests from accessing it easily. Additionally, maintain a dry environment around the foundation to reduce the likelihood of pests.
Cost Considerations
The decision to install cedar shake siding encompasses various financial aspects that homeowners must evaluate. Understanding the costs involved, as well as comparing cedar shake siding to alternative materials, is essential for making an informed choice. This section provides a comprehensive breakdown of costs associated with cedar shake siding, including installation and potential return on investment.
Comparative Analysis of Siding Costs
When evaluating siding options, cedar shake siding typically falls within a higher price range compared to other materials such as vinyl, aluminum, or fiber cement. The following table illustrates a comparative analysis of the average costs per square foot for various siding materials:
| Siding Material | Average Cost per Square Foot |
|---|---|
| Cedar Shake Siding | $6 – $12 |
| Vinyl Siding | $2 – $7 |
| Aluminum Siding | $3 – $6 |
| Fiber Cement Siding | $4 – $8 |
Cedar shake siding’s higher cost reflects its aesthetic appeal and natural insulation properties. Homeowners should weigh these benefits against the cost differences when choosing their siding material.
Breakdown of Installation Costs
The installation costs for cedar shake siding generally include both materials and labor. On average, homeowners can expect to pay between $8 and $20 per square foot for the complete installation. A detailed breakdown includes:
Materials
The cost of the cedar shakes themselves typically ranges from $6 to $12 per square foot, depending on the quality and treatment of the wood.
Labor
Labor costs can vary significantly based on the region and complexity of the installation, averaging around $2 to $8 per square foot.For example, if a homeowner is installing cedar shake siding on a 1,500 square foot home, the total estimated cost could range from $12,000 to $30,000, including both materials and labor.
Potential Return on Investment
Investing in cedar shake siding can yield significant returns, primarily due to the material’s durability and aesthetic appeal. Homeowners can typically expect a return on investment (ROI) of approximately 70% to 80% when selling their home, particularly in markets that favor high-quality, natural materials.Additionally, the long lifespan of cedar shake siding, which can last up to 30 years with proper maintenance, contributes to its overall value.
Enhanced curb appeal and energy efficiency are further factors that can elevate property value. In conclusion, while the initial investment for cedar shake siding is higher than some alternatives, the long-term benefits and potential for return on investment make it a viable option for many homeowners seeking quality and style.
Environmental Impact
Cedar shake siding is not only a beautiful and traditional choice for home exteriors but also has significant sustainability attributes that make it an attractive option for eco-conscious homeowners. The inherent properties of cedar wood, coupled with responsible sourcing practices and eco-friendly treatments, contribute to a lower environmental footprint compared to other siding materials.Cedar wood is naturally resistant to decay, insects, and harsh weather conditions, which enhances its durability and longevity.
This means that cedar shake siding does not require frequent replacement, reducing waste over time. Additionally, the production of cedar siding typically results in less energy consumption compared to synthetic alternatives, as cedar is a renewable resource.
Sourcing Practices for Cedar Wood
The sustainability of cedar shake siding heavily relies on responsible sourcing practices. Sustainable forestry practices ensure that cedar trees are harvested in a manner that maintains the ecological balance and supports forest regeneration. Some key aspects of responsible cedar sourcing include:
- Certification Standards: Many suppliers of cedar wood adhere to certification programs such as the Forest Stewardship Council (FSC), ensuring that the wood has been sourced from responsibly managed forests.
- Local Sourcing: Utilizing cedar from local suppliers reduces transportation emissions, thus minimizing the overall carbon footprint associated with the material.
- Reforestation Efforts: Many companies actively participate in or fund reforestation initiatives, helping to ensure the long-term sustainability of cedar forests.
Eco-Friendly Treatments and Finishes
While cedar wood possesses natural resistance to various environmental stressors, applying eco-friendly treatments and finishes can further enhance its performance and longevity. Considerations for eco-friendly treatments include:
- Water-Based Finishes: These finishes have low volatile organic compound (VOC) emissions and are less harmful to both the environment and human health compared to traditional oil-based products.
- Natural Sealants: Sealants made from natural ingredients, such as plant oils or waxes, provide protection against moisture and UV rays while being biodegradable.
- Non-Toxic Stains: Utilizing non-toxic stains not only preserves the beauty of cedar but also ensures that harmful chemicals do not leach into the ecosystem.
Incorporating these eco-friendly treatments not only enhances the longevity of cedar shake siding but also aligns with sustainable building practices, further solidifying its status as an environmentally responsible choice for homeowners.
Final Thoughts
In summary, the installation of cedar shake siding not only enhances the aesthetic and functional aspects of your home but also provides a sustainable choice for environmentally conscious homeowners. By understanding the preparation, installation process, and maintenance requirements, you can ensure that your investment remains protected and visually appealing for years to come. Embracing cedar shake siding is a decision that harmonizes beauty with practicality, making it a worthy addition to any home.
Quick FAQs: Cedar Shake Siding Installation
What is the average lifespan of cedar shake siding?
The average lifespan of cedar shake siding is typically between 20 to 30 years, depending on maintenance and environmental conditions.
Can cedar shake siding be painted or stained?
Yes, cedar shake siding can be painted or stained to enhance its appearance or provide additional protection against the elements.
How does cedar shake siding perform in extreme weather?
With proper installation and maintenance, cedar shake siding can perform well in extreme weather, but regular inspections are necessary to prevent damage.
Is cedar shake siding suitable for all climates?
While cedar shake siding is versatile, its suitability varies by climate; it is best in moderate climates but may require additional treatment in humid or wet regions.
How often should cedar shake siding be inspected?
It is recommended to inspect cedar shake siding at least once a year to identify any potential issues early and ensure its longevity.